Master the Art of Writing a Check: A Step-by-Step Guide
Writing a check may seem like a lost art in today's digital-first world, but it's still an essential skill that everyone should know. Whether you're paying bills, writing a check to a friend, or using a physical check for business purposes, making sure to get it right is crucial to avoid any difficulties or disputes. In this article, we'll take you through the steps on writing a check with ease and confidence.
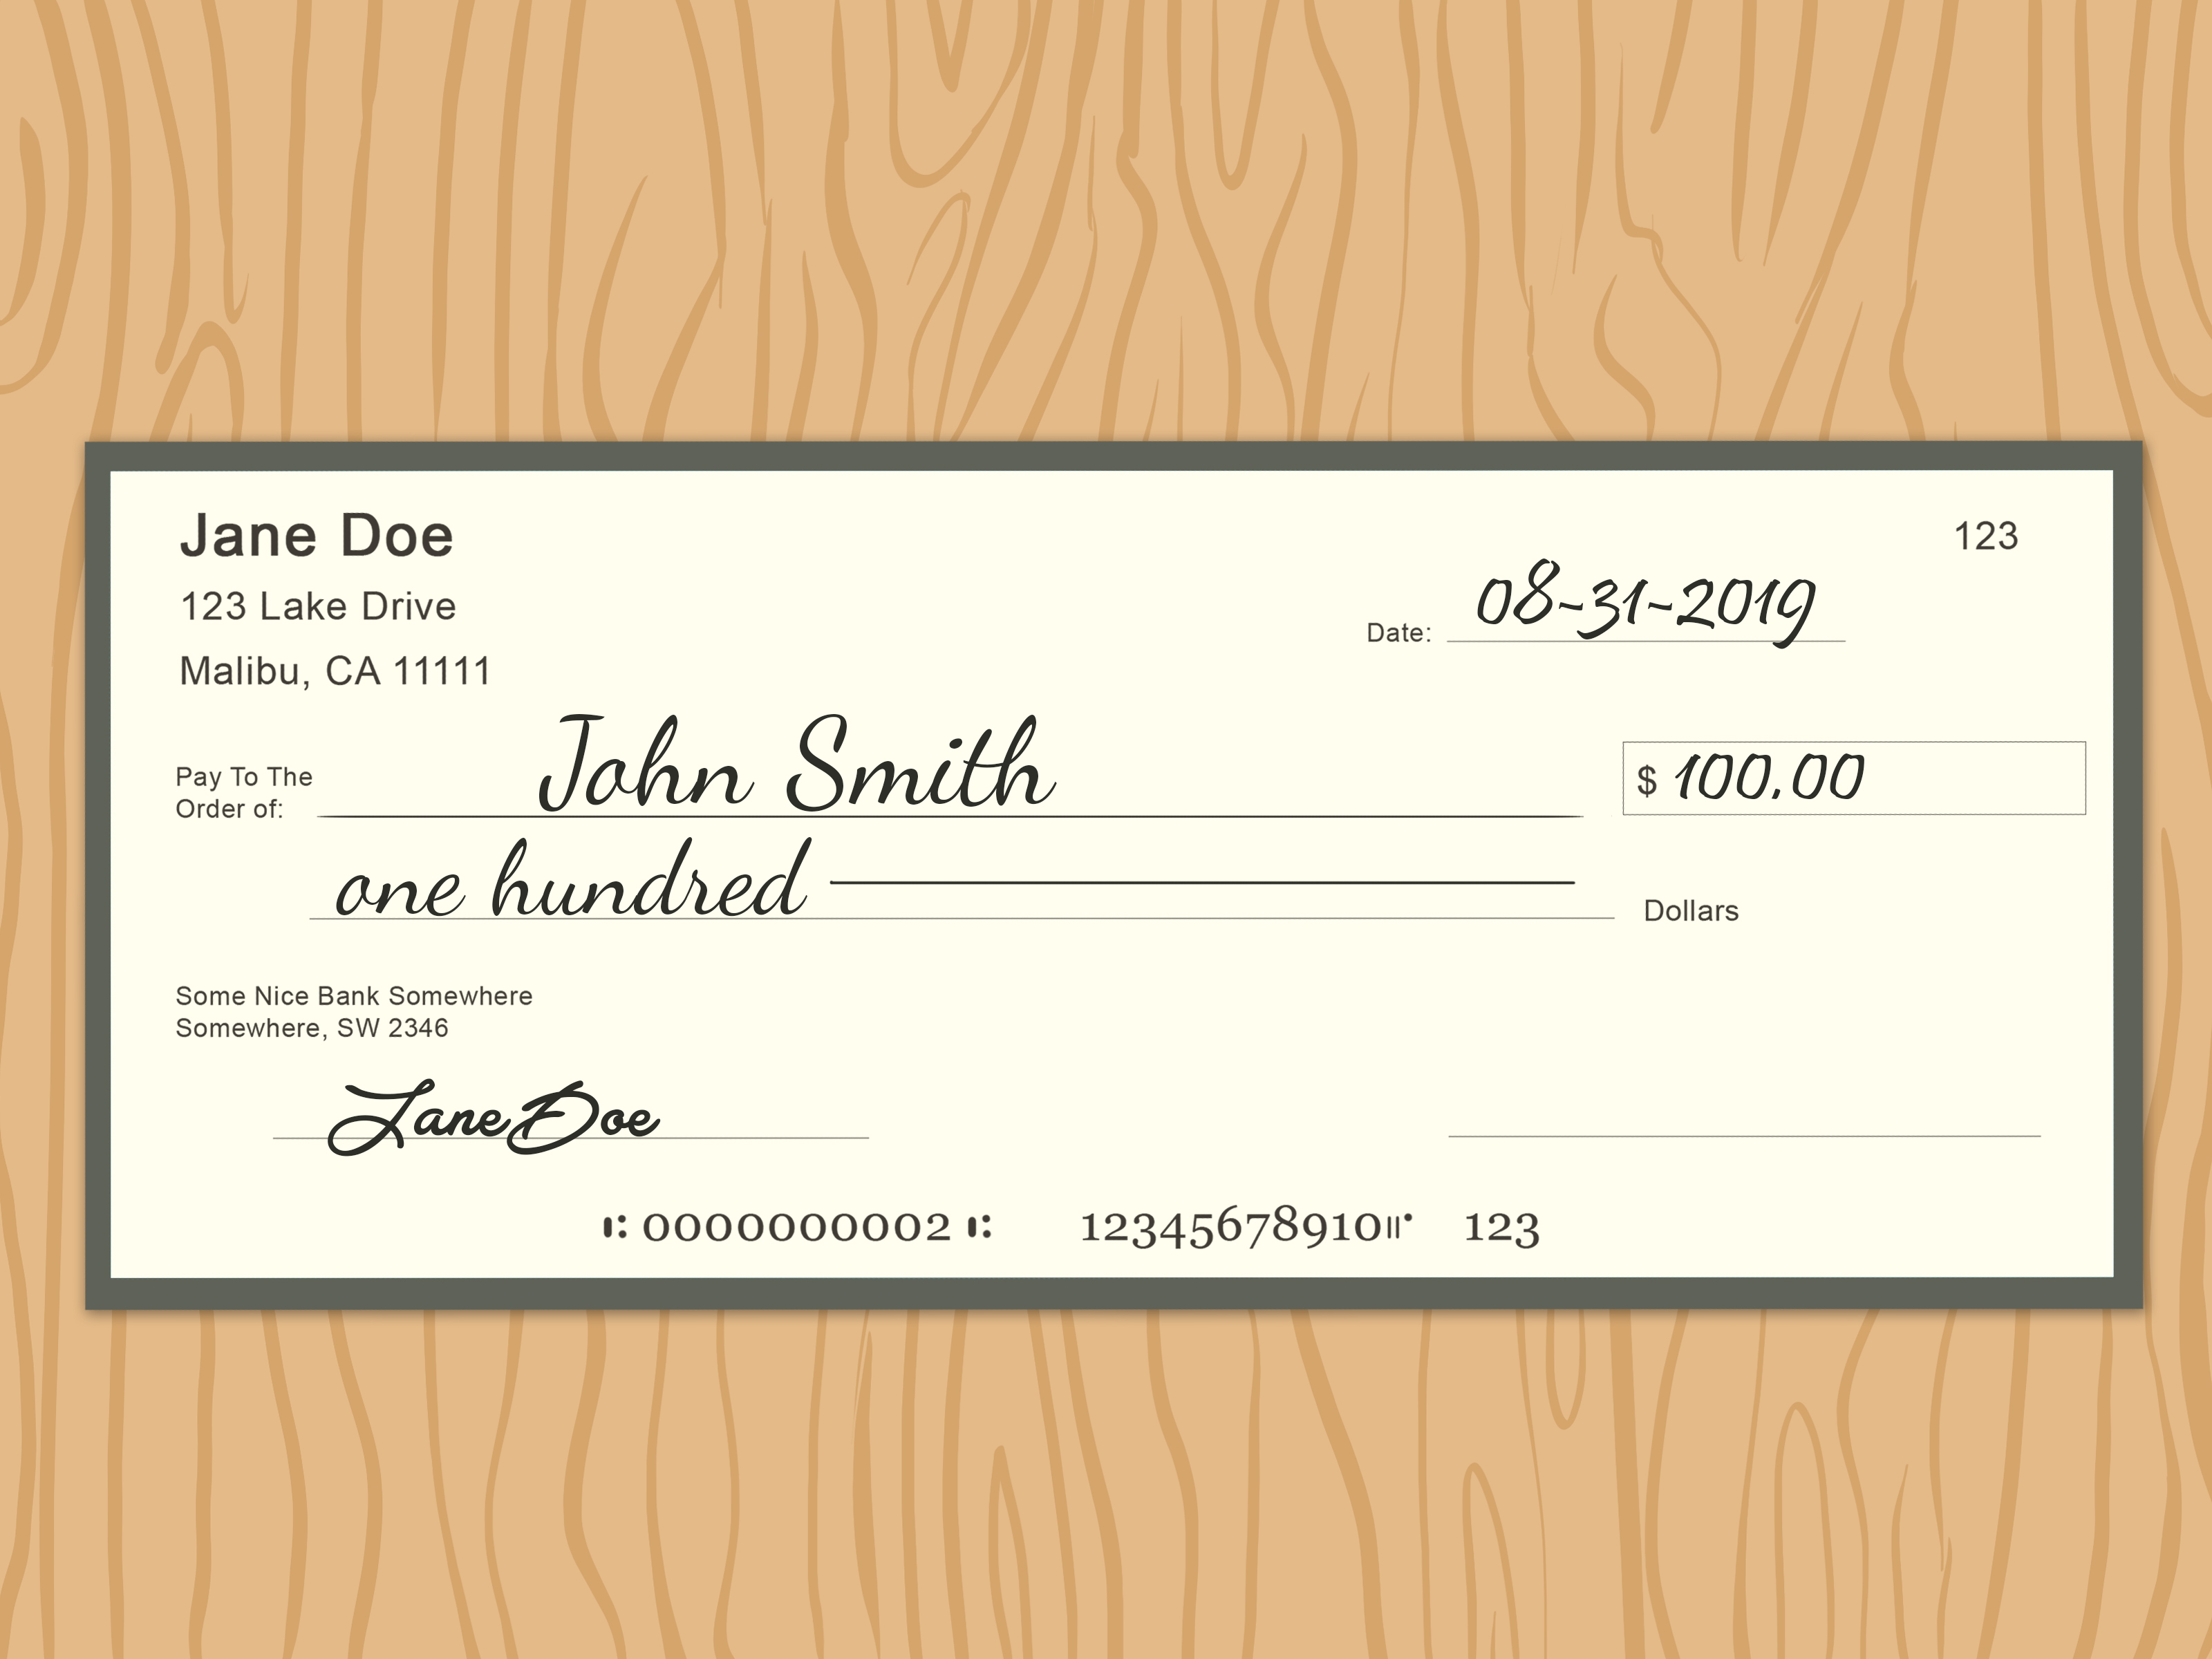
Step 1: Date the Check
The first step in writing a check is to date it. This is usually done in the upper right corner of the check. The date should be the current date or the date of issue. Writing a future date can be a common mistake, so make sure to fill in the current date.
When to Date the Check
- Current date for immediate payment
- Future date for post-dated checks (checks written in advance)
Step 2: Payee Information
On the line below the date, write the payee's name. This should be the recipient's full name, as it appears on their ID. Make sure to spell the name correctly to avoid any issues.
How to Write a Payee's Name
- Use the payee's full name as it appears on their ID
- Double-check the spelling for accuracy
This particular example perfectly highlights why Steps On Writing A Check is so captivating.
Step 3: Dollar Amount
The next step is to write the dollar amount in the box provided, including cents. This should be done carefully to avoid any errors. Remember to also write the dollar sign ($) before the amount.
How to Write the Dollar Amount
- Include cents (e.g., $10.50)
- Use the dollar sign ($) before the amount
The memo or description line is the area where you can include a brief explanation of what the check is for. This can be helpful for both you and the recipient.
Example of a Memo
- Electricity payment for May
- Trash collection for the next two months
Step 5: Signature
Finally, sign the check in the bottom right corner. This should be an original signature, not a copied one. Make sure your signature matches the one on file with the bank.

Such details provide a deeper understanding and appreciation for Steps On Writing A Check.
Important Signing Information
- Sign the check in the bottom right corner
- Use your original signature
- Match the signature to the one on file with the bank
Step 6: Verify and Review
Double-check all the information on the check, including the date, payee's name, dollar amount, and memo. Ensure everything is accurate and spelled correctly.
Final Checks
- Date
- Payee's name
- Dollar amount
- Memo or description
- Signature
Conclusion
Writing a check can seem intimidating, but by following these simple steps, you'll be able to do it with confidence. Remember to date the check correctly, include the payee's name, write the dollar amount, add a memo or description, and sign the check in the bottom right corner. Double-check everything before finalizing the check to ensure accuracy and avoid any potential issues. With practice, you'll master the art of writing a check in just a few simple steps.


")


![Picture of What Are SMART Goals? Examples and Templates [2026] • Asana](https://assets.ltkcontent.com/images/44711/parts-of-a-check_7abbbb2796.jpg "What Are SMART Goals? Examples and Templates [2026] • Asana")

 - wikiHow")
