How to Take a Screenshot on Mac with AirDrop: A Step-by-Step Guide
Introduction
Taking a screenshot on your Mac can be a useful skill, and when combined with the AirDrop feature, it becomes even more convenient. In this article, we will explore how to take a screenshot on Mac with AirDrop, which allows you to quickly share files, photos, and more between nearby Apple devices.What is AirDrop?
AirDrop is a feature developed by Apple that enables users to share files, photos, and more between devices that are nearby. It uses Wi-Fi and Bluetooth connectivity to facilitate seamless file transfers. AirDrop is available on all Apple devices, including iPhones, iPads, and Macs.Why Take a Screenshot on Mac with AirDrop?

Step-by-Step Guide to Taking a Screenshot on Mac with AirDrop
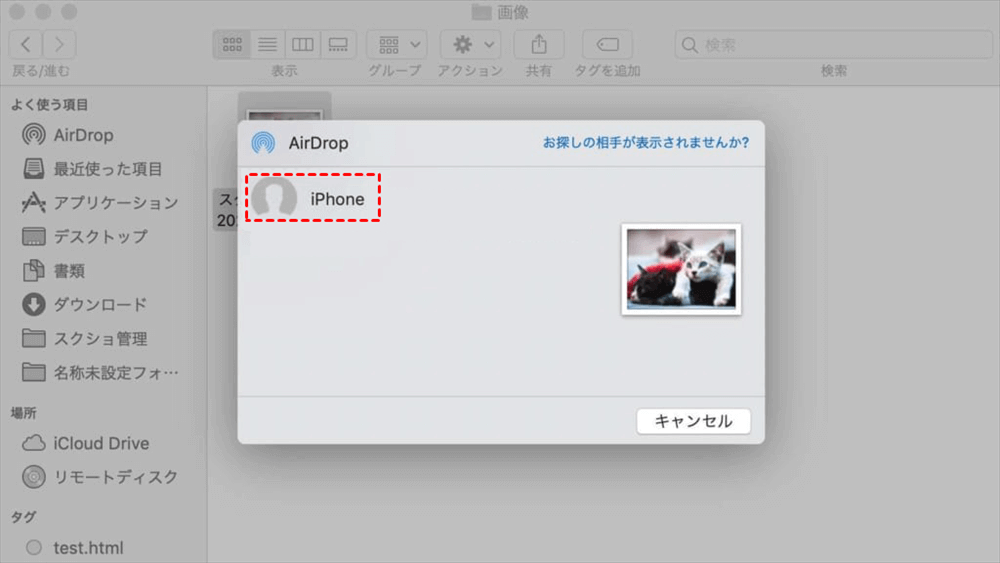
To take a screenshot on Mac with AirDrop, follow these steps:- Open the Finder window on your Mac.
- Click on the "Files" tab and select "AirDrop".
- Make sure that Wi-Fi and Bluetooth are turned on on your Mac.
- On your iPhone or iPad, go to Settings > General > AirDrop and select "Everyone" (or "Contacts Only" if you prefer).
- Now, on your Mac, click on "AirDrop" in the Finder window and select the device you want to share the screenshot with.
- Take a screenshot on your Mac using the keyboard shortcut Command + Shift + 4 (or Command + Shift + 3 for the entire screen).
- The screenshot will be automatically sent to your iPhone or iPad via AirDrop.
Alternative Method: Using Screenshot App
Such details provide a deeper understanding and appreciation for Screenshot On Mac With Airdrop.
If you're using macOS 10.15 or later, you can use the Screenshot app to take a screenshot and then share it via AirDrop. Here's how:- Take a screenshot using the Screenshot app, which can be found in the Launchpad.
- Open the Screenshot app and select the screenshot you just took.
- Click on the "Share" button and select "AirDrop" from the list of options.
- The screenshot will be automatically sent to your iPhone or iPad via AirDrop.


 - Mashable ME")


