How to Protect an Excel Sheet: A Comprehensive Guide
Excel is a powerful tool for data analysis and spreadsheet management. However, with great power comes great responsibility. When you share your Excel files with others, you may want to protect certain sheets or the entire file to prevent unauthorized changes or data breach. In this article, we will explore six effective ways to protect an Excel sheet, including password protection, data validation, read-only mode, and more.
There are several reasons why you may want to protect an Excel sheet, including:
To protect an Excel sheet, you can use various methods, including password protection, data validation, read-only mode, and more. In this article, we will explore each of these methods in detail, so you can choose the best approach for your needs.
Method 1: Password Protection
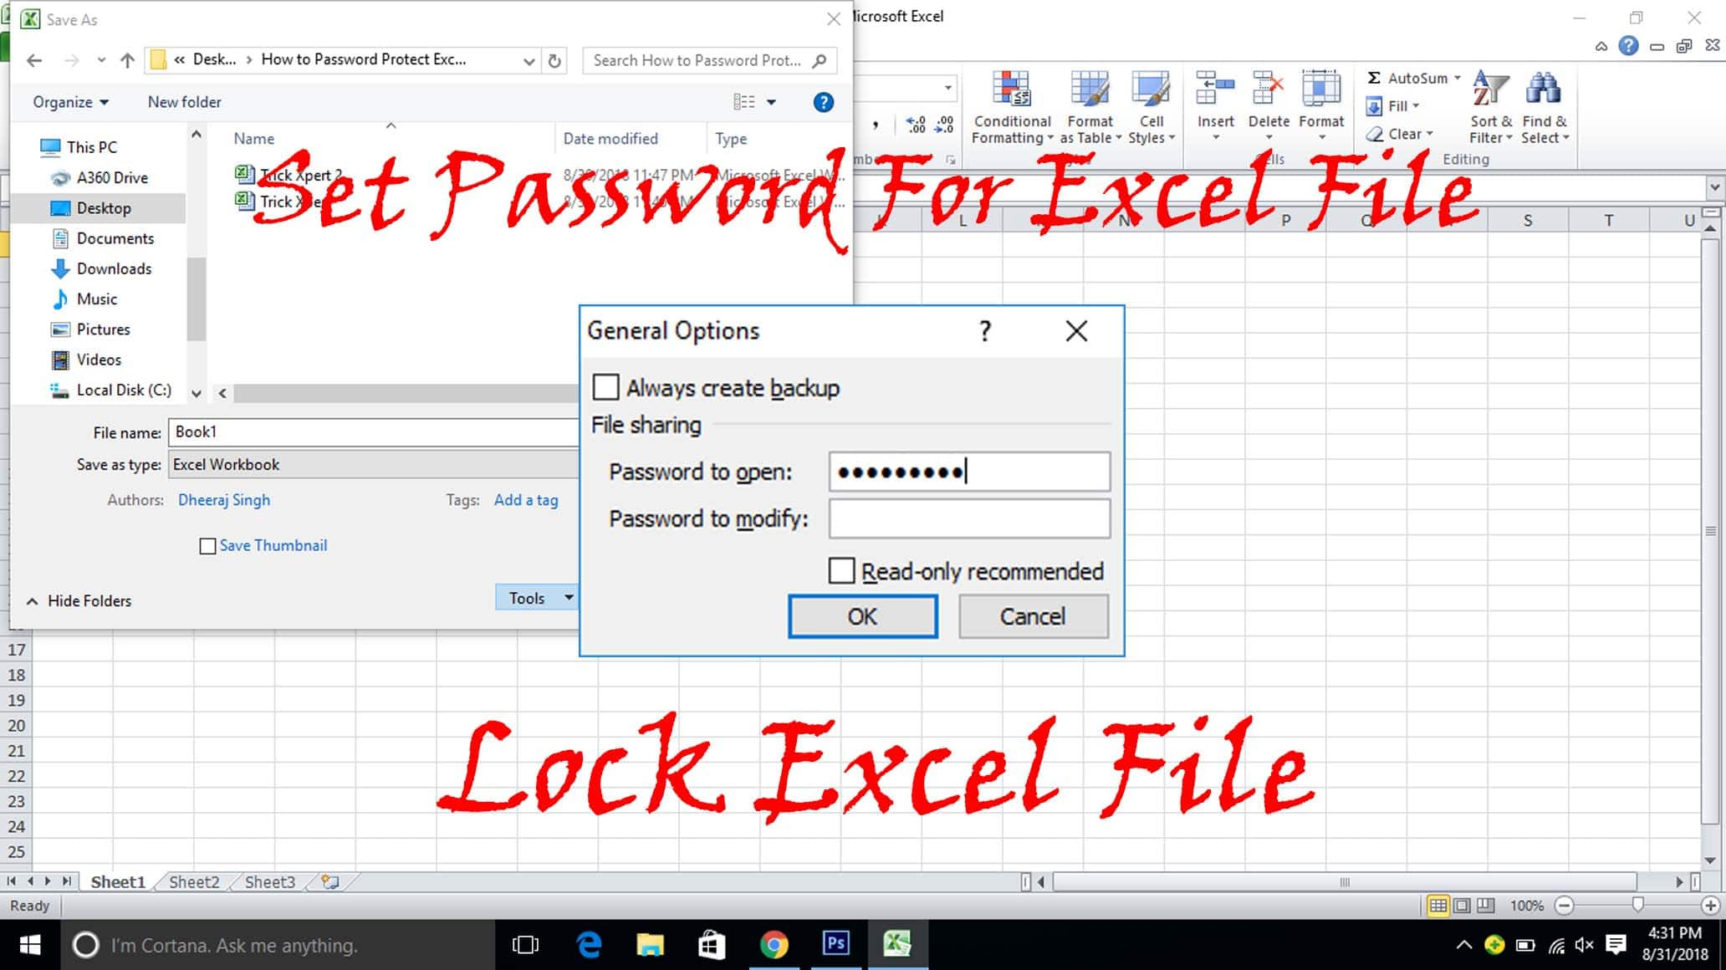
Password protection is a simple and effective way to protect an Excel sheet. You can set a password to prevent users from opening or editing the sheet. To do this:
- Open the Excel file and click on the "Review" tab
- Click on "Protect Sheet" or "Protect Workbook"
- Enter a password and confirm it
- Click "OK" to apply the password protection

Moving forward, it's essential to keep these visual contexts in mind when discussing How To Protect An Excel Sheet.
When you protect an Excel sheet with a password, you can choose to lock certain cells, formulas, or other elements to prevent changes. This is useful for protecting sensitive data or preventing accidental changes to formulas.
Method 2: Data Validation
- Select the cell or range of cells you want to protect
- Go to the "Data" tab and click on "Data Validation"
- Choose a rule, such as "Whole number" or "Text Length," and apply it to the selected cells
Read-only mode is another effective way to protect an Excel sheet. When you set a sheet to read-only, users can view the data but cannot make changes. To apply read-only mode:
- Open the Excel file and click on the "Review" tab
- Click on "Protect Sheet" or "Protect Workbook"
- Choose "Read Only Recommended" and click "OK"
When you set a sheet to read-only, you can still make changes to the data but prevent users from making changes. This is useful for sharing data with others who need to view the data but should not make changes.
Method 4: Worksheet Protection
Worksheet protection is a more advanced method for protecting an Excel sheet. You can use worksheet protection to lock cells, formulas, or other elements and prevent changes. To apply worksheet protection:
- Open the Excel file and click on the "Review" tab
- Click on "Protect Sheet" or "Protect Workbook"
- Choose the "Protect sheet" option and click "OK"
When you apply worksheet protection, you can choose to lock specific cells, formulas, or other elements, which helps prevent unauthorized changes to sensitive data.
Method 6: Information Rights Management (IRM)
Information Rights Management (IRM) is a more advanced method for protecting Excel files. IRM allows you to control access to files and restrict certain actions, such as editing or printing. To apply IRM:

When you apply IRM, you can control access to files and restrict certain actions, which helps prevent unauthorized changes to sensitive data.
Conclusion
Protecting an Excel sheet is crucial for data security and integrity. In this article, we explored six effective ways to protect an Excel sheet, including password protection, data validation, read-only mode, worksheet protection, VBA macros, and IRM. By choosing the right method for your needs, you can safeguard sensitive data and prevent unauthorized changes.
Final Thoughts
Protecting an Excel sheet is not a one-size-fits-all solution. You need to choose the right method for your needs, considering factors such as data sensitivity, user access, and organizational requirements. By taking a proactive approach to data protection, you can ensure data security and integrity, and maintain the trust of your users.


![How do I Protect worksheet and use filters also in excel? [SOLVED]](https://www.isunshare.com/images/article/excel-password/how-to-protect-multiple-sheets-in-excel-2010-workbook/protect-excel-sheets-with-protection-function.png "How do I Protect worksheet and use filters also in excel? [SOLVED]")

")


/001-how-to-password-protect-excel-file-4691050-97189238f2fc4cb59383b0ebd2593b3d.jpg "how to protect the colum in excle sheet - Excel Help Forum")


